
Imagine standing under the vast Arctic sky, shivering from the cold and sheer anticipation. Suddenly, the dark canvas above comes alive with an ethereal dance of light; swirling green, pink, and violet hues illuminate the night. This is the magic of the Northern Lights, or Aurora Borealis, a celestial spectacle that has captivated humans for millennia. Among the myriad places on Earth where this natural wonder graces the skies, Norway stands out as a premier destination for photographers eager to capture its beauty.
Photographing the Northern Lights is about preserving memory and immortalizing the surreal dance of nature’s light show. However, capturing the aurora borealis is as challenging as it is rewarding, requiring the right equipment and technical know-how but also a touch of patience and a dash of luck. In the heart of Norway’s winter wilderness, photographers find a unique canvas that promises the enchantment of the lights themselves and the breathtaking landscapes for which the country is renowned.
In this guide, “Capture the Magic: Expert Tips for Northern Lights Photography in Norway!”, we will take you through everything you need to know to successfully photograph the Northern Lights. From understanding this spectacular phenomenon to selecting the perfect gear, from planning your arctic adventure to mastering the art of night photography, we’ll equip you with the knowledge and tips to capture not just an image, but an experience that embodies the magic of the aurora borealis.
So, ready your cameras and let’s embark on a journey to the heart of Norway’s night sky, where the Northern Lights await to be captured.
II. Understanding the Northern Lights
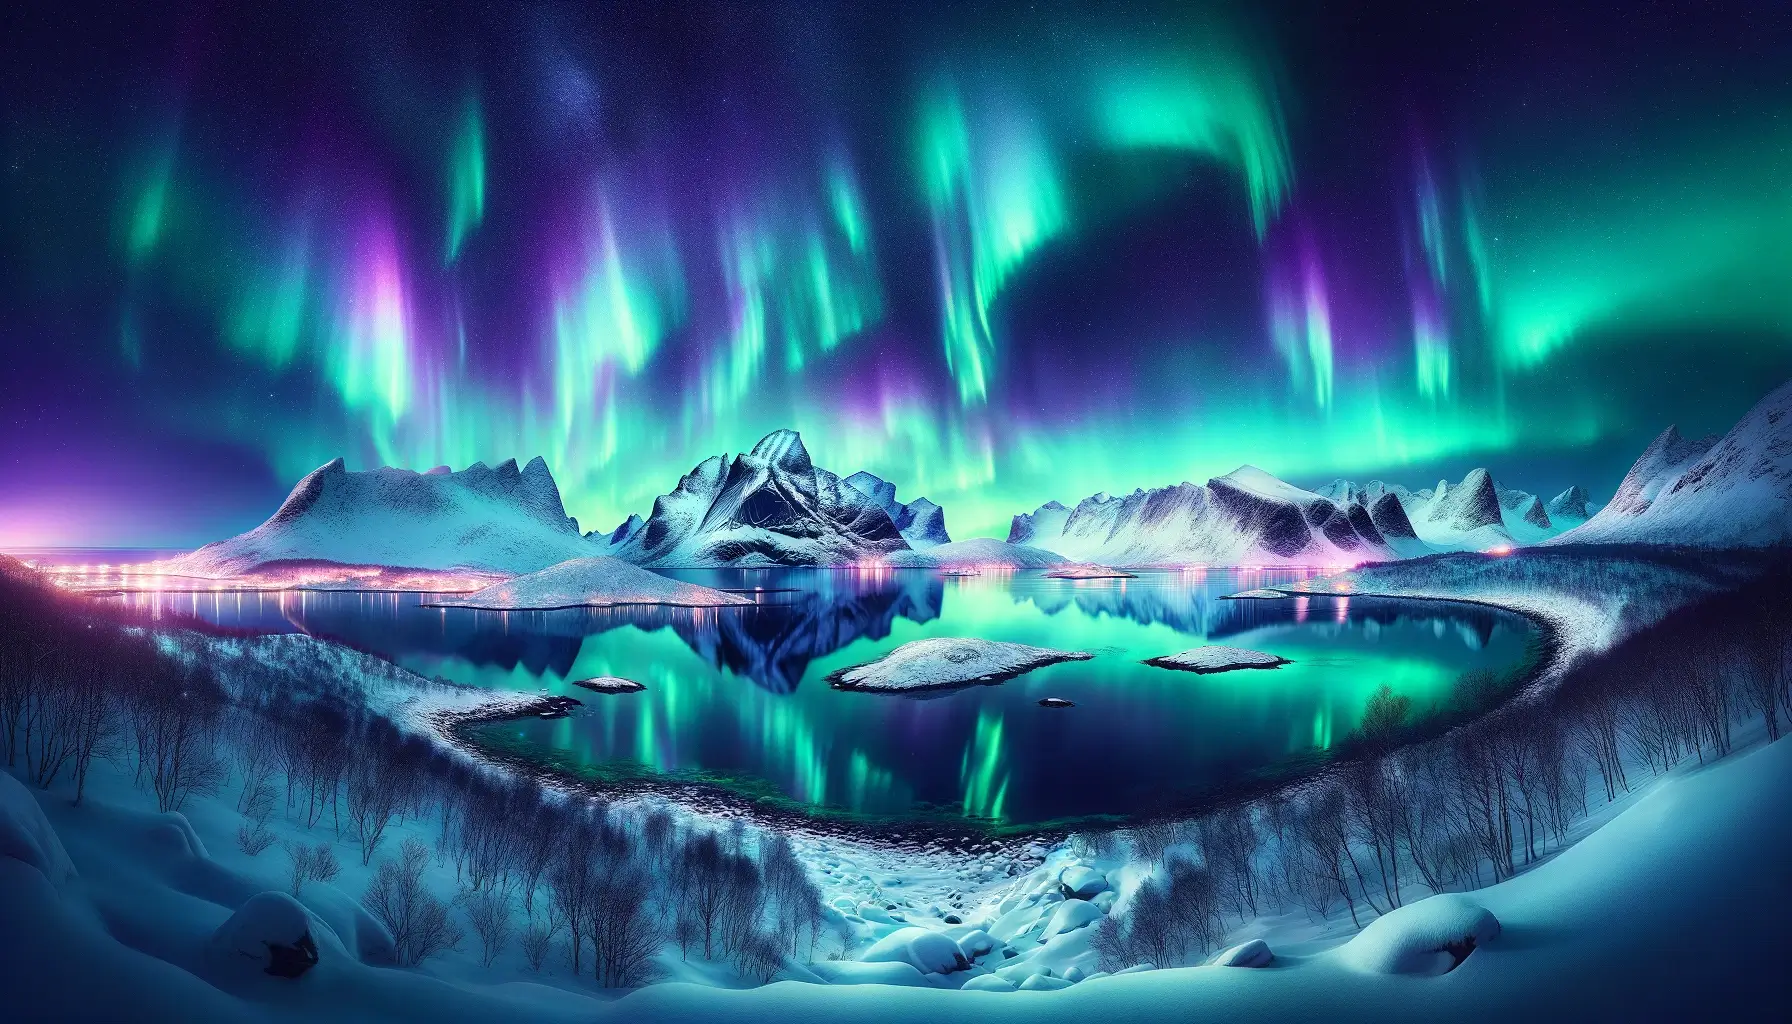
Before embarking on your journey to capture the Northern Lights in Norway, it’s essential to grasp what this phenomenon is and the science behind its mesmerizing display. The Northern Lights, or Aurora Borealis, are a natural light display predominantly seen in the high-latitude regions around the Arctic and Antarctic. This spectacle is the result of collisions between electrically charged particles from the sun that enter the Earth’s atmosphere and collide with gases such as oxygen and nitrogen.
The Science of the Aurora
The sun emits a stream of charged particles known as the solar wind. When this stream reaches Earth, it can interact with the magnetosphere, a region around the Earth protected by its magnetic field. During periods of increased solar activity, these charged particles are funneled towards the poles by Earth’s magnetic field, where they collide with atmospheric gases. These collisions emit light, creating the beautiful colors that illuminate the night sky. The colors can vary depending on the type of gas molecules involved; oxygen produces green and red lights, while nitrogen gives off blue and purple hues.
Best Times of the Year to Witness the Northern Lights in Norway
The aurora borealis is a winter phenomenon in the Northern Hemisphere, with the season typically stretching from late September to early April. This period offers the best chance to witness the lights due to the long, dark nights, especially above the Arctic Circle where the sun does not rise for several weeks or even months.
The activity of the Northern Lights varies and follows an 11-year solar cycle. The peak of this cycle, known as solar maximum, brings more frequent and intense displays, while the solar minimum phase results in less activity. However, the Northern Lights can be observed throughout the cycle if conditions are right.
Visibility is heavily dependent on weather conditions and solar activity. Clear, dark skies away from light pollution are essential for observing and photographing the aurora. Apps and websites dedicated to aurora forecasts can help plan your adventure, offering predictions on both solar activity and cloud cover.
Understanding the science behind the Northern Lights and knowing the best times to witness them in Norway are crucial first steps in planning your photography expedition. Armed with this knowledge, you can better anticipate when and where to set up your camera to capture the celestial dance of the aurora borealis.
III. Planning Your Trip
Capturing the Northern Lights in Norway requires more than just showing up with a camera. Careful planning can significantly increase your chances of witnessing and photographing this elusive natural wonder. Here’s how to prepare for your Northern Lights photography adventure:
Choosing the Right Location
Tromsø: Often dubbed the Northern Lights capital, Tromsø offers a high probability of sightings along with urban comforts. Its surrounding areas are less affected by light pollution, providing dark skies ideal for photography.
Lofoten Islands: The dramatic landscapes of Lofoten serve as a stunning backdrop for the Northern Lights. The unique combination of peaks rising from the sea and traditional fishing villages adds a magical element to your shots.
Svalbard: For those seeking the ultimate winter darkness, Svalbard is unparalleled. Located far above the Arctic Circle, the sun does not rise for months in winter, offering extended opportunities to witness the aurora.
When to Go
The Northern Lights season in Norway runs from late September to early April, with the peak occurring in the darkest months—December through February. However, planning your visit during the shoulder months of September, October, and March can offer fewer crowds and still provide excellent chances of sightings.
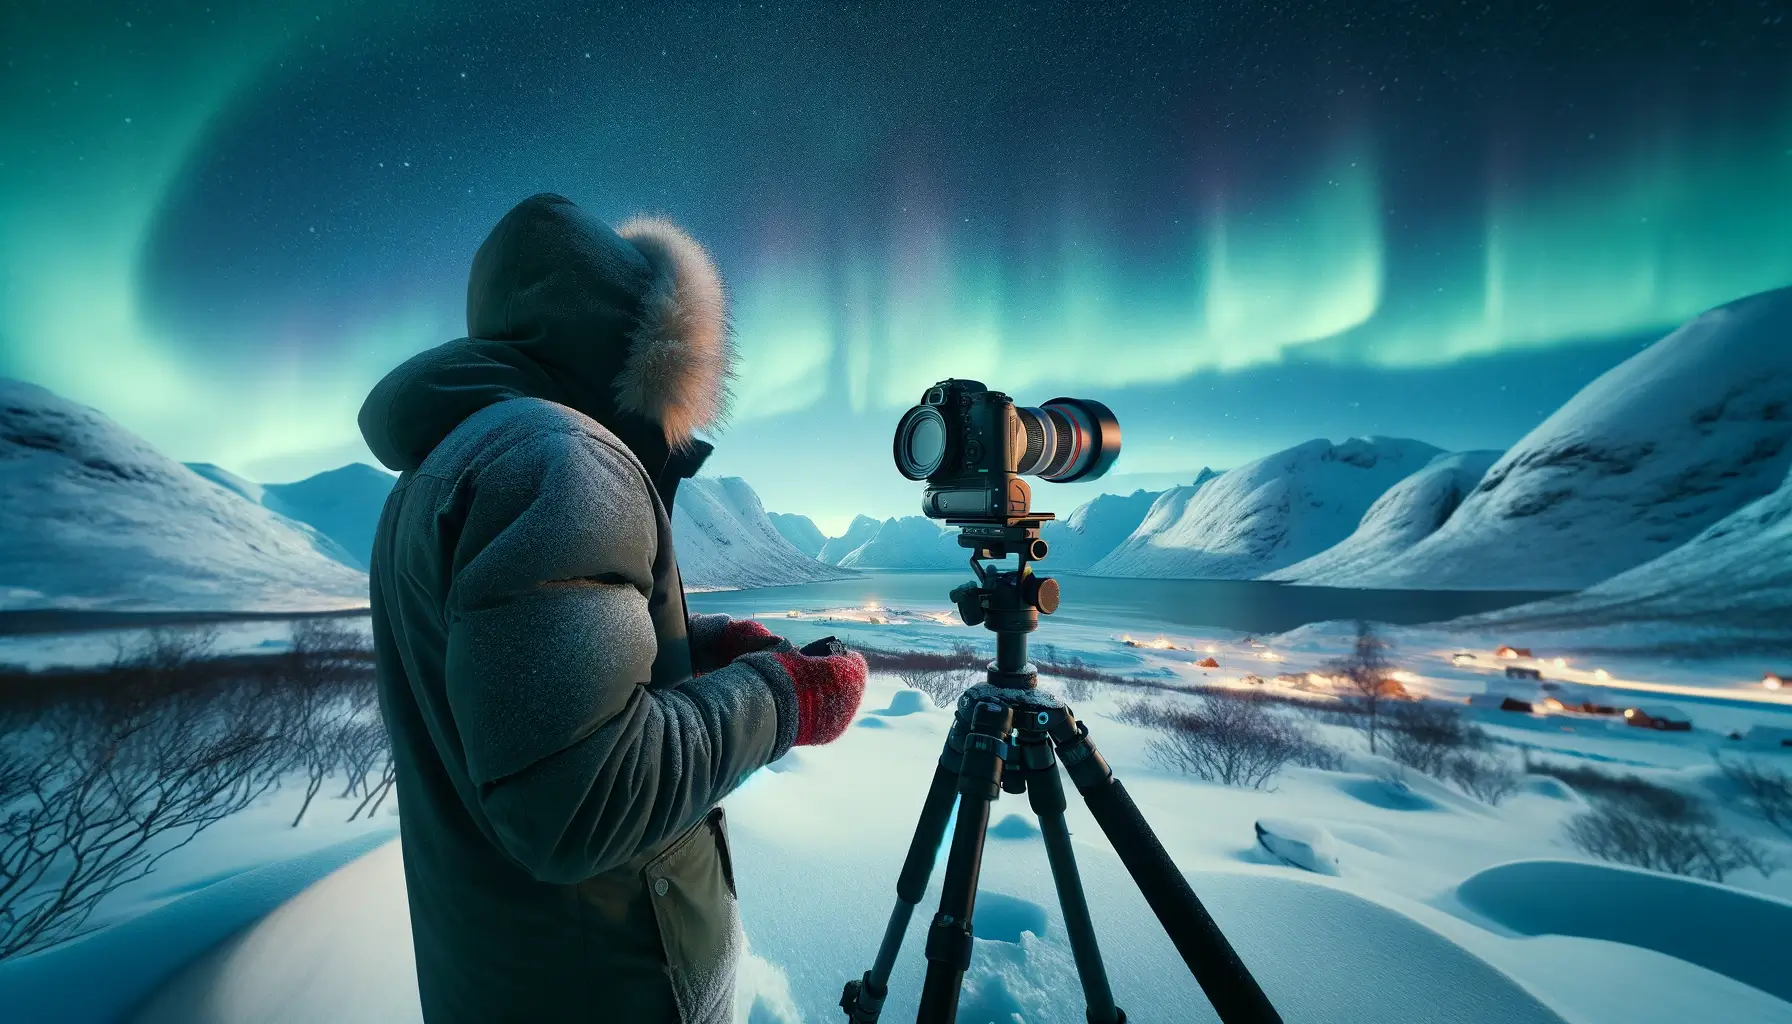
Equipment Essentials
- Camera: A DSLR or mirrorless camera with manual mode capability is essential for Northern Lights photography.
- Lens: A wide-angle lens with a large aperture (f/2.8 or wider) is ideal for capturing expansive landscapes and allowing enough light for a clear shot.
- Tripod: A sturdy tripod is crucial for stabilizing your camera during long exposures required to capture the aurora.
- Remote Shutter Release: To avoid camera shake and ensure sharp images, a remote shutter release or wireless trigger is recommended.
- Extra Batteries: Cold weather can drain batteries quickly, so it’s vital to have spares on hand.
Preparing for the Cold
Photographing the Northern Lights often means spending several hours outdoors in freezing conditions. Dressing in layers, using thermal clothing, and bringing hand and foot warmers can make the experience more comfortable and allow you to focus on capturing the moment rather than battling the cold.
Apps and Resources
Several apps and websites provide forecasts for both aurora activity and weather conditions. Utilizing these resources can help you plan your outings more effectively, ensuring you’re in the right place at the right time.
IV. Photography Tips and Techniques

Capturing the Northern Lights requires a blend of the right gear, technical knowledge, and creative intuition. Here are expert tips and techniques to help you take stunning aurora photographs:
Camera Settings
- Manual Mode: Always shoot in manual mode to have full control over your camera settings.
- ISO: Start with an ISO between 800 to 3200, adjusting based on the aurora’s brightness and your camera’s noise performance.
- Aperture: Use the widest aperture (lowest f-number) your lens allows to let in as much light as possible. f/2.8 or wider is ideal.
- Shutter Speed: Begin with a 15 to 20-second exposure. Adjust depending on the aurora’s movement; shorter exposures for fast-moving auroras, longer for fainter ones.
- White Balance: Set your white balance to daylight to preserve the natural colors of the aurora. Adjust in post-processing if needed.
Composition and Framing
- Foreground Interest: Incorporate elements like mountains, trees, or buildings to add depth and scale to your images.
- Rule of Thirds: Use the rule of thirds to compose your shots, placing the horizon on the bottom or top third of the frame to create a balanced image.
- Reflections: Water bodies can provide stunning reflections of the aurora. Look for lakes or fjords that can serve as a mirror for the lights.
Focusing in the Dark
- Manual Focus: Autofocus is unreliable in the dark. Switch to manual focus and set your lens to infinity (∞), adjusting slightly if necessary.
- Use a Bright Star or Distant Light: Focus on a bright star or a distant light source to ensure sharpness in your night shots.
Capturing Movement
- Experiment with Shutter Speed: Capture the dynamic movement of the aurora by adjusting your shutter speed. Shorter exposures will freeze the motion, while longer ones will create a smoother, more flowing effect.
Practical Considerations
- Check the Weather and Aurora Forecast: Use aurora forecast apps and websites to choose the best night for your shoot.
- Patience is Key: The aurora can be unpredictable. Be prepared to wait and keep your camera ready for when the show begins.
- Battery Management: Keep spare batteries warm in your pocket and swap them out as needed. Cold conditions drain battery life quickly.
Safety and Etiquette
- Be Aware of Your Surroundings: Keep a flashlight handy to navigate in the dark, but use it sparingly to avoid disturbing others or affecting your night vision.
- Respect Nature: Stay on marked paths and respect local guidelines to preserve the natural environment.
V. Post-Processing Your Photos
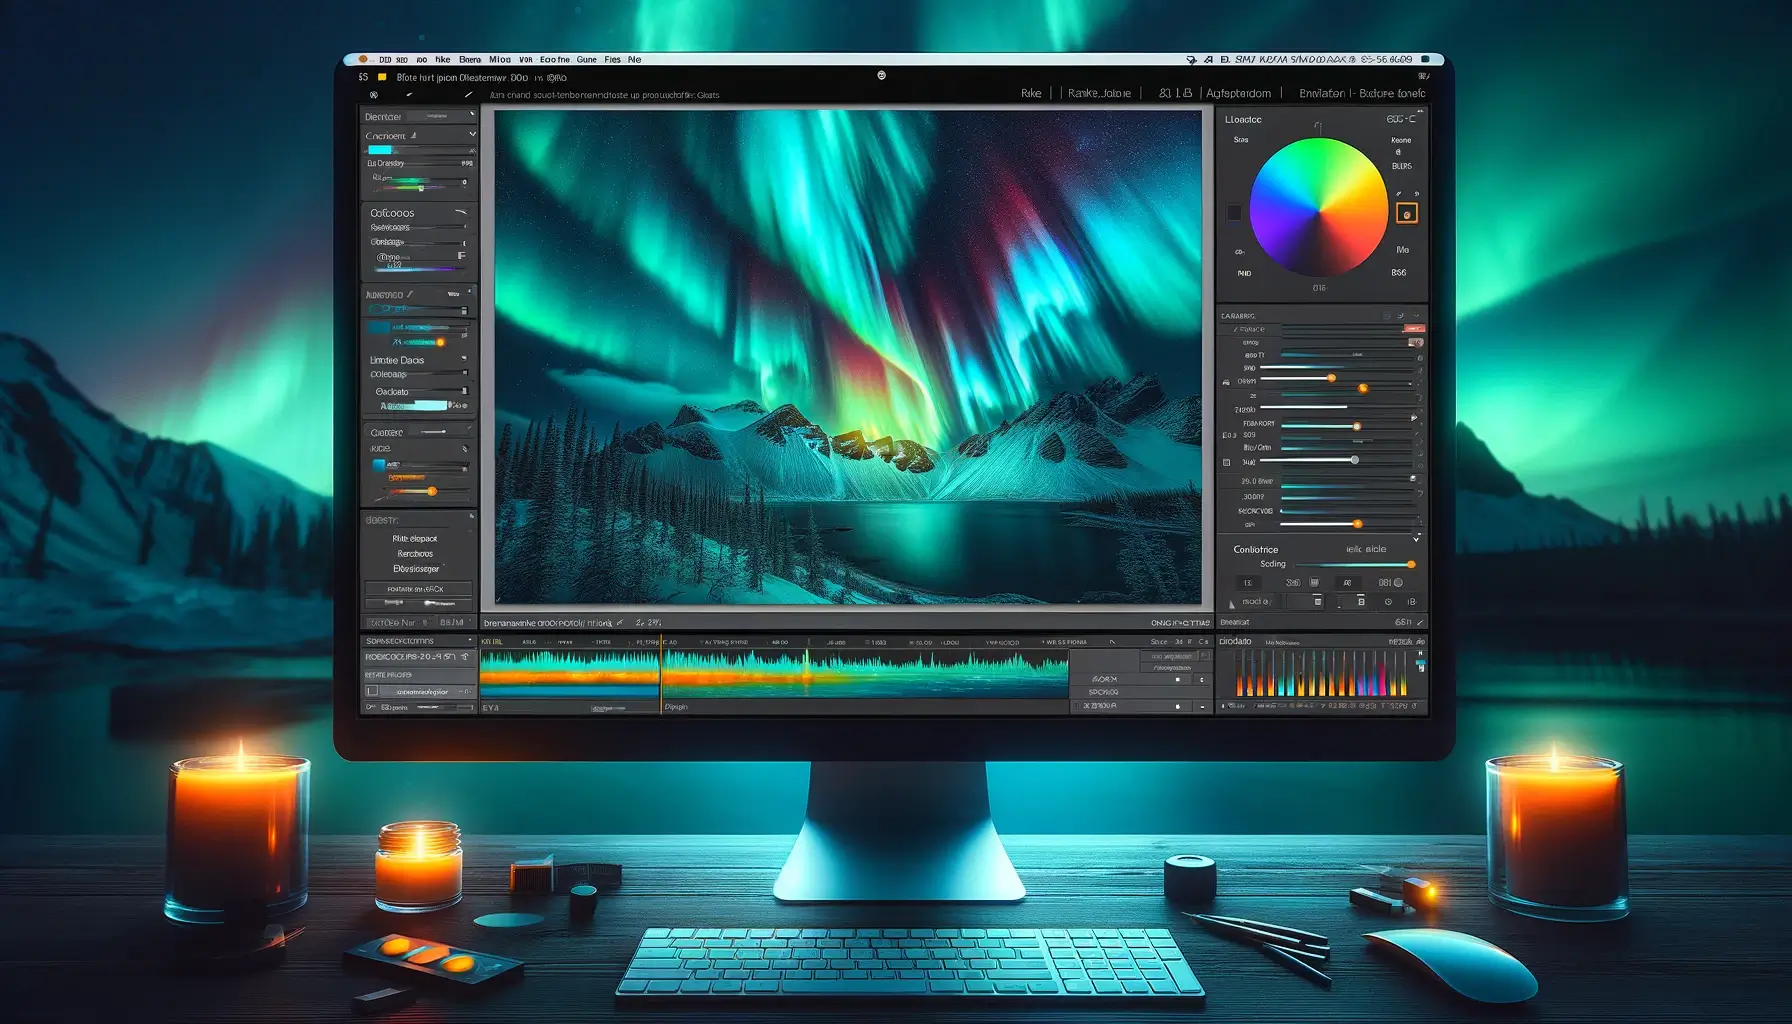
After capturing the Northern Lights, post-processing can enhance your images, bringing out the full spectrum of colors and details often missed by the naked eye. Here are some basic editing tips and techniques to help you refine your aurora photographs:
Basic Editing Tips
- RAW Format: Always shoot in RAW format to capture the maximum amount of detail and allow for greater flexibility in post-processing.
- Exposure Adjustments: If your image is too dark or too bright, adjust the exposure to bring out the details in the aurora and the landscape.
- Contrast and Clarity: Increasing contrast can help make the aurora stand out against the night sky, while clarity can bring out the textures in the lights.
- Saturation and Vibrance: Adjusting saturation and vibrance can enhance the colors of the aurora, making them more vivid without appearing unnatural.
Enhancing the Aurora
- Selective Color Adjustments: Use selective color adjustments to fine-tune the hues of the aurora, enhancing the greens, purples, and reds that define this natural spectacle.
- Noise Reduction: High ISO settings necessary for night photography can introduce noise. Use noise reduction features sparingly to maintain detail while reducing grain.
- Sharpening: Apply sharpening to enhance the details of the aurora and the landscape. Be careful not to over-sharpen, as this can introduce unwanted artifacts.
Advanced Techniques
- Layer Masking: For more advanced editing, use layer masks in software like Adobe Photoshop to apply adjustments to specific parts of the image, such as the aurora, without affecting the rest of the image.
- Star Reduction: To make the aurora stand out even more, consider reducing the brightness of the stars in the image. This can help focus attention on the aurora itself.
Post-processing is an integral part of the photography process, especially for capturing phenomena like the Northern Lights. By following these tips and experimenting with different techniques, you can enhance your photos to reflect the awe-inspiring beauty of the aurora borealis. Remember, the goal of post-processing is to bring out the best in your images while maintaining a natural look that reflects your unique experience of witnessing the Northern Lights.
VI. Conclusion
Capturing the Northern Lights in Norway is an adventure that combines the thrill of travel with the passion for photography. It’s an opportunity to witness one of nature’s most spectacular displays and to preserve this magical moment through your lens. The journey from planning your trip to post-processing your images is filled with challenges, learning experiences, and, most importantly, the joy of creating something truly beautiful.
This guide has walked you through understanding the Northern Lights, planning your trip, choosing the right equipment, mastering photography techniques in the dark, and enhancing your images with post-processing. Each step is crucial in its own right, contributing to the ultimate goal of capturing the aurora borealis in all its glory.
Remember, photography is as much about the experience as it is about the outcome. Standing under the vast Arctic sky, watching the aurora dance above, is a moment of pure wonder. Whether you’re a seasoned photographer or a passionate beginner, the Northern Lights in Norway offer a canvas like no other.
As you embark on this journey, keep in mind that patience and perseverance are your best allies. The Northern Lights are elusive, and their beauty is fleeting. But with preparation, the right gear, and a bit of luck, you’ll capture not just images, but memories that will last a lifetime.
We hope this guide inspires you to chase the Northern Lights and brings you one step closer to capturing the magic of the aurora borealis. The night sky over Norway awaits, ready to reveal its most enchanting spectacle. So, pack your gear, embrace the adventure, and let the lights guide you to your next breathtaking photograph.